Importing & Exporting Test Cases via CSV
QAM Hub lets you import test cases from a CSV file and export them back to CSV. This is the fastest way to move an existing test base into QAM Hub — for example from spreadsheets or another tool — and to pull your cases out for backups or sharing.
This guide covers both directions. If you are setting up your first suite, start with creating test suites and test cases.
Importing test cases from CSV
- Open the suite you want to import cases into (CSV import works within a Test Cases suite).
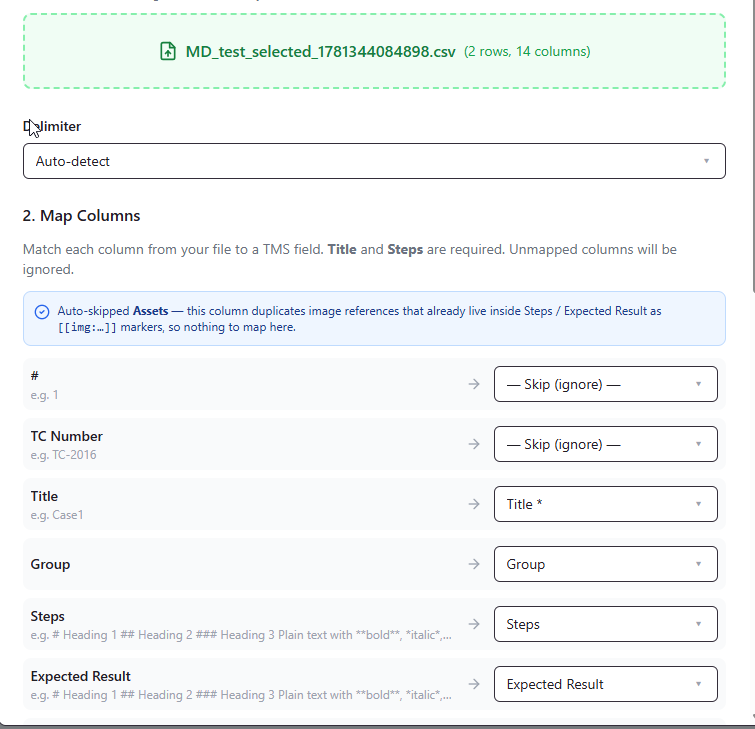
- Choose the Import from CSV option and select your file.
- Match your CSV columns to QAM Hub's test case fields (such as title, steps, and expected result), then confirm the import.
- Review the imported cases in the suite. Each receives a project-unique case number, the same as cases created manually.
Tip: to see exactly which columns and headers QAM Hub expects, export an existing suite to CSV first (next section) and use that file as your template. Matching your spreadsheet to that structure makes the import clean.
Exporting test cases to CSV
- Open the suite you want to export.
- Choose the Export to CSV option.
- QAM Hub generates a CSV of the suite's test cases, which downloads to your computer.
Exporting is useful for backups, for sharing test cases with people who don't use QAM Hub, and — as noted above — for producing a column template before an import.
Migrating from spreadsheets or another tool
If your tests currently live in Google Sheets, Excel, or another TMS, CSV import is the bridge: export from your current source to CSV, align the columns to QAM Hub's format, and import. For the bigger picture on why teams move off spreadsheets, see test management vs spreadsheets.